Shopping around boutiques and stores lately, I’ve seen these Gnomes everywhere! If you love to craft then this would be a good one to make. I’m actually making these with some girls in my neighborhood. They are super easy to make. You could even switch out the hats for different holidays. Check this out!
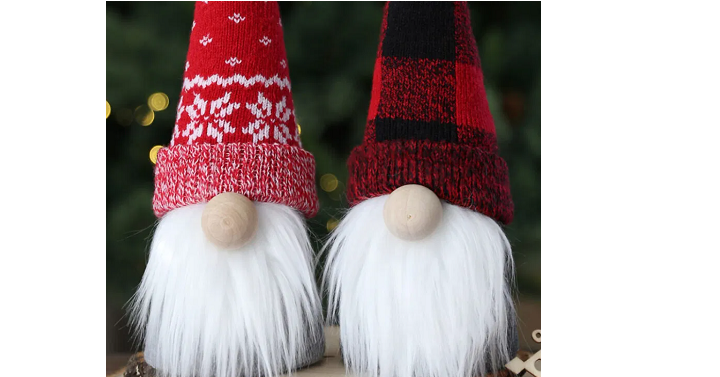
How to Make Sock Gnomes
Instruction and picture by It’s Always Autumn
Supplies:
- 1 Patterned Crew Sock adult size
- 1 Solid Color Crew Sock adult size
- 1 9 inch Foam Cone
- 1 4 x 4 inch Piece of Faux Fur
- 1 1.25 inch Wood Bead
- Hot Glue Gun
- Holiday Decorations (buttons, felt piece, etc.) optional
Instructions:
- Cut off the bottom (toe part) of a solid colored sock, just past the heel (as shown below). Pull the sock over the bottom of the cone and pull it up so it covers the lower 5 inches of the cone. Use hot glue to secure the top of the sock to the cone.
- Cut out a beard from fur. It’s easiest to draw the beard shape on the back of the fur. Cut the beard about 3.25 inches tall and 2.75 inches wide. When cutting fur, you DO NOT want to just use scissors and cut it out like you would any other fabric because then the fur along the edges of the beard will be very short. To make sure you get the long “beard” effect on the fur, you have two options. First, you can use a razor blade or exacto knife and cut from the back of the fur, cutting through the backing only. Second, you can use sharp scissors, but you’ll want to cut with the back of the fur facing you, and slide the bottom of your scissor through the fur very close to the backing. Your goal is to just cut the backing, not any of the fur itself. Place the beard on the sock at the 4.5 inch mark, or halfway up the cone. Hot glue the beard to the sock.
- Hot glue a bead onto the beard as shown below. Note that the bead is only touching beard, not sock.
- Make the hat. Turn the patterned sock inside out. If sewing, pin a diagonal line as you see below, then sew along it and trim about 1/2 an inch away from the line you sewed. I used a serger here, but a regular sewing machine works just fine. Just set the stitch length a bit longer than normal and try not to stretch the sock as you sew. Alternately, if you don’t want to sew, you can mark a diagonal line as you see in the photo. Cut about 1/2 an inch to the right of it. Glue the right sides of the sock together along the cut line.
- Turn the sock right side out, then place it over top of the cone as a hat. The sock will stick to the cone as you place it on, so it will take a minute to pull it on. Watch the video to see the easiest way to do this. Decorate the hat with holiday shaped buttons, felt pieces, jingle bells, etc., if desired.


")
")

